
一起来做石头剪刀布
1.微信小程序
小伙伴们,好久不见了,今天一起来玩微信小程序吧,首先我们要去申请微信公众号的账号,拿到账号后,我们就可以去下载微信开发者工具,它的连接在这里
https://developers.weixin.qq.com/miniprogram/dev/devtools/download.html在里面选择合适的版本,安装打开,建立一个最基本的项目就行
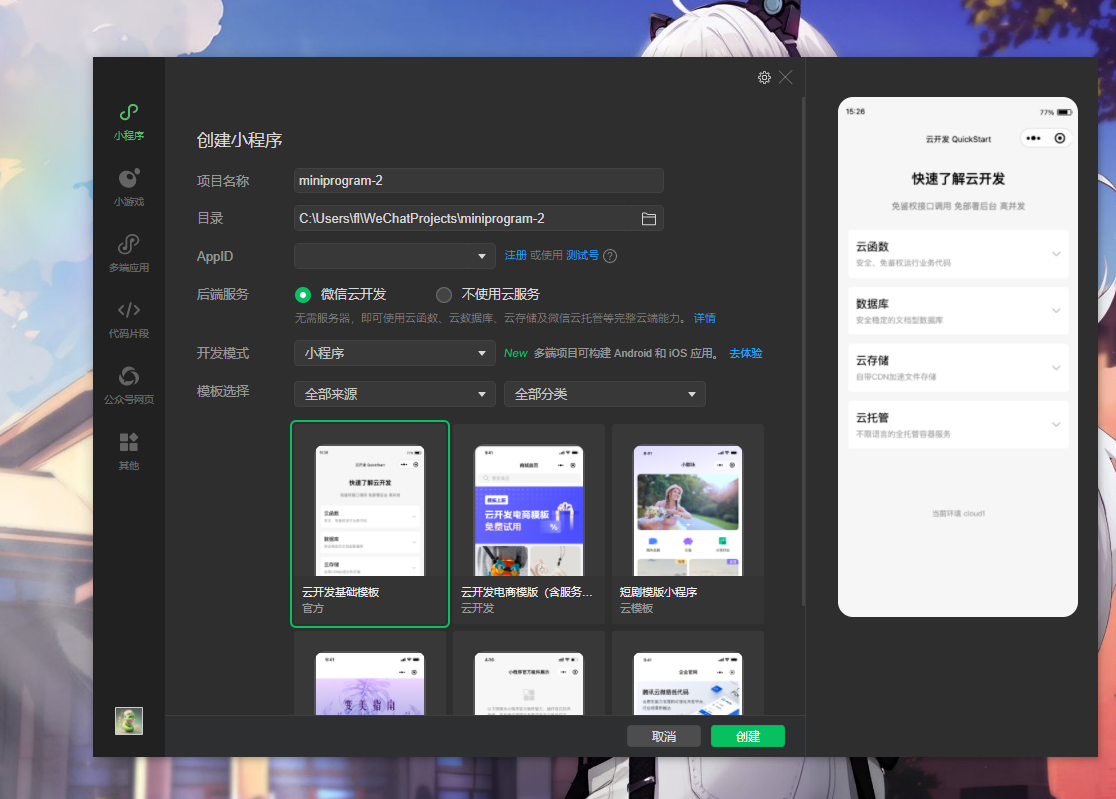
appID 我们可以直接用测试号的.
2.项目结构
因为我们的项目比较简单,项目结构也是一目了然,嗯,长这个样子
图片已经失效了
和前端非常像,index.wxml对应HTML,wxss对应css,js还是js,现在我们简单的做个页面代码吧.index.wxml
<!--pages/index/index.wxml-->
<view class="container">
<text class="win-text">你已经获胜了</text>
<text class="win-num">{{winNum}}次</text>
<view class="result">
<image src="{{imgAi}}" class="imgAi"></image>
<text class="notice">{{notice}}</text>
<image src="{{imgUser}}" class="imgUser"></image>
</view>
<view class="test">
<text class="notice-punches">猜猜我会出什么呢?~</text>
<view class="imageGroup">
<image type="primary" class="btn" bindtap="btnclick" data-choose="0" src="/images/shitou.png" class="image"></image>
<image type="primary" class="btn" bindtap="btnclick" data-choose="1" src="/images/jiandao.png" class="image"></image>
<image type="primary" class="btn" bindtap="btnclick" data-choose="2" src="/images/bu.png" class="image"></image>
</view>
</view>
<button class="btn-again" bindtap="again">再来!</button>
</view>
接下来是wxss,
.win-text {
  text-align: center;
}
.win-num {
  color: red;
  text-align: center;
}
.result {
  height: 160rpx;
  display: inline-block;
}
.notice {
  width: 100rpx;
  color: red;
  /*height:140rpx;*//*line-height:140rpx;*/
  text-align: center;
  display: inline-block;
  padding-top: 0rpx;
}
.imgAi {
  width: 140rpx;
  height: 140rpx;
  padding: 10rpx 0 10rpx 10rpx;
}
.imgUser {
  width: 140rpx;
  height: 140rpx;
  padding: 10rpx 0 10rpx 10rpx;
}
.notice-punches {
  text-align: center;
  display: block;
  padding-top: 20rpx;
}
image {
  width: 100px;
  height: 100px;
  border-radius: 50%;
}
然后就是控制行为的JS代码
// ######################################################################################################
// pages/index/index.js
let timer; // 使用let代替var,避免变量提升问题

Page({
  data: {
    srcs: [
      '/images/shitou.png',
      '/images/jiandao.png',
      '/images/bu.png'
    ],
    imgAi: '',       // 电脑显示的图片
    imgUser: '/images/wenghao.png', // 用户图片(注意修正拼写错误)
    notice: '',      // 比赛结果
    winNum: 0,       // 胜利次数(添加默认值)
    btnpunches: false // 出拳状态
  },

  onLoad: function() {
    // 初始化胜利次数(兼容首次加载无缓存的情况)
    this.setData({
      winNum: wx.getStorageSync('winNum') || 0
    });
    this.timerGo();
  },

  // 电脑随机切换图片
  timerGo() {
    timer = setInterval(() => {
      this.setData({
        imgAi: this.data.srcs[Math.floor(Math.random() * 3)]
      });
    }, 200);
  },

  // 用户点击出拳
  btnclick(e) {
    if (this.data.btnpunches) return;

    const userChoice = parseInt(e.currentTarget.dataset.choose); // 改用currentTarget
    const aiChoice = this.data.srcs.indexOf(this.data.imgAi);
    let result = '';

    // 先设置用户选择图片
    this.setData({
      btnpunches: true,
      imgUser: this.data.srcs[userChoice]
    });

    clearInterval(timer); // 停止电脑动画

    // 胜负判断逻辑
    if (userChoice === aiChoice) {
      result = '平局';
    } else if ((userChoice === 0 && aiChoice === 1) ||
               (userChoice === 1 && aiChoice === 2) ||
               (userChoice === 2 && aiChoice === 0)) {
      result = '你赢了';
      this.updateWinNum();
    } else {
      result = '你输了';
    }

    this.setData({ notice: result });
  },

  // 更新胜利次数
  updateWinNum() {
    const newNum = this.data.winNum + 1;
    wx.setStorageSync('winNum', newNum);
    this.setData({ winNum: newNum });
  },

  // 再来一局
  again() {
    if (!this.data.btnpunches) return;

    this.timerGo();
    this.setData({
      btnpunches: false,
      imgUser: '/images/wenghao.png',
      notice: ''
    });
  }
});
3.最终效果
全部的代码就是这些了,注意我们的根目录,并没有关于存放图片的,所以需要我们直接建立一个,images,用来存放图片,一共4张图片,可以在网上找到, 最后的效果就是这样了
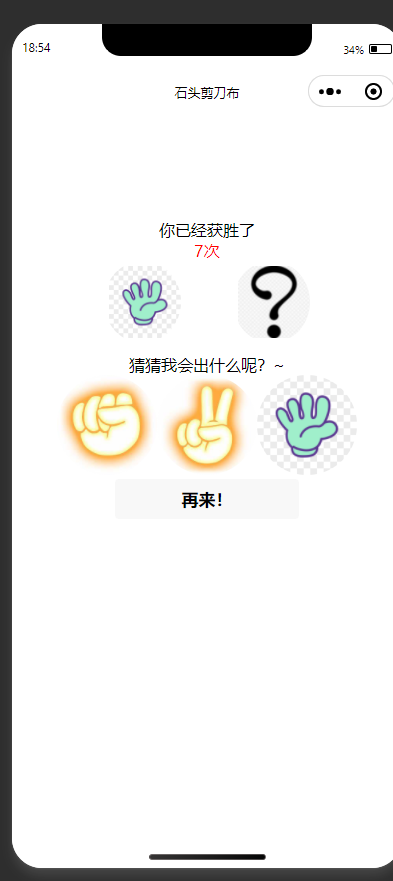
一个简单的微信小程序,就这样完成了,下次再见吧
本文是原创文章,采用 CC BY-NC-ND 4.0 协议,完整转载请注明来自 小天使
评论
匿名评论
隐私政策
你无需删除空行,直接评论以获取最佳展示效果
音乐天地